 how-to
How to Phase Outdoor Kitchen Construction
Table of Contents
- Phase 1: Site Assessment and Design Planning
- Outdoor Kitchen Planning Steps: Layout and Work Zones
- Phase 2: Permits, Inspections, and Utility Planning
- Outdoor Kitchen Construction Phases: Foundation and Infrastructure
- Outdoor Kitchen Project Timeline: Building and Installation
- Phase 3: Final Finishes, Testing, and Inspection
- Managing Budget, Lead Times, and Common Rework Risks
- Frequently Asked Questions
Last Updated: October 11, 2026
Phase 1: Site Assessment and Design Planning
The first phase of outdoor kitchen construction starts with careful evaluation of your backyard and a clear vision for how you'll use the space. This planning stage determines whether your project succeeds or creates costly problems later.
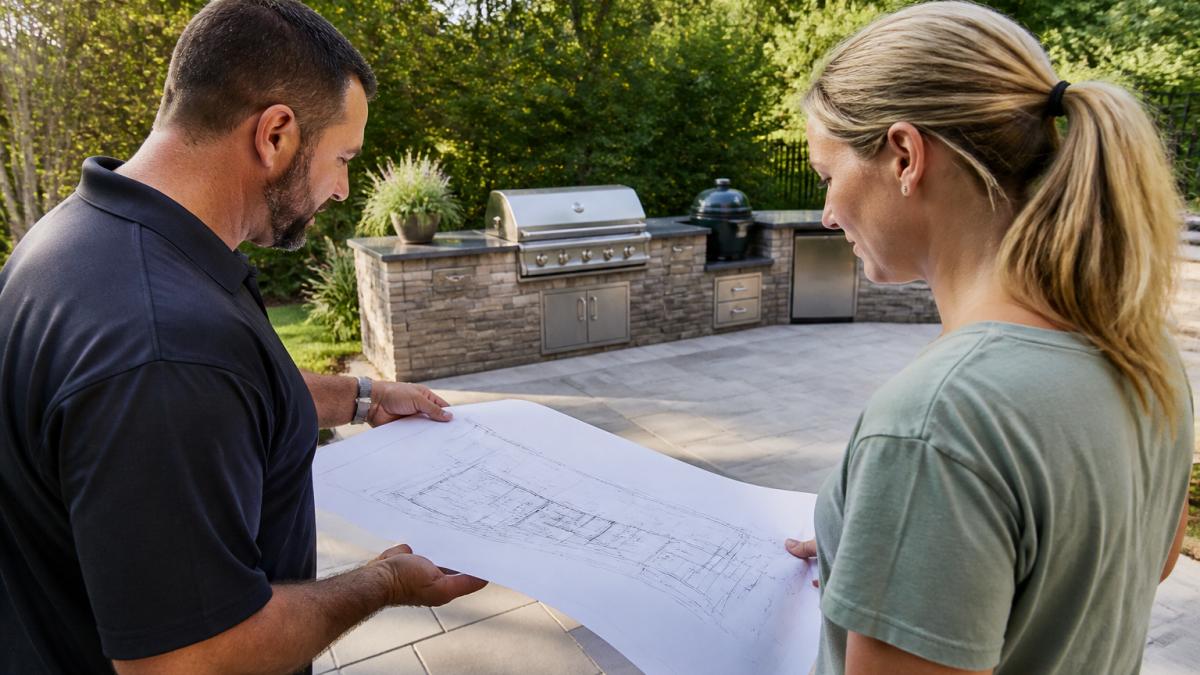
Evaluate backyard space and site conditions
Measure available space, note sun exposure at different times, and identify drainage patterns. Check for slopes, wet areas, and water pooling. Call your local utility locating service to mark underground utilities before digging. Soil type, tree shade, and wind patterns all influence foundation work and equipment placement.
Define cooking style and how you'll use the space
Consider how often you entertain and what you cook. A family that grills weekly needs different infrastructure than one hosting monthly gatherings. Wood-fired pizza requires different equipment than grilling steaks. Frequent entertainers need more counter space and storage. Let your lifestyle drive the design.
Outdoor Kitchen Planning Steps: Layout and Work Zones
Choose your layout and arrange work zones
Choose a layout, work triangle, linear, or island, based on your space and cooking style. Arrange zones for efficient movement: prep area near sink, grill positioned away from seating, refrigerator in a cool spot, storage within arm's reach. Keep pathways at least three feet wide so guests move freely without disrupting food preparation.
Plan traffic flow and seating areas
Position seating separate from the cooking zone but close enough for conversation. Use bar-height counters for casual gathering and dining tables with clear paths for formal dining. Consider sun exposure, morning sun is pleasant, afternoon sun brutal, and add shade structures as needed. Plan wind protection for coastal or exposed areas.
Phase 2: Permits, Inspections, and Utility Planning
Secure required permits and understand building codes
Most jurisdictions require permits for outdoor kitchens with gas or electrical work. Contact your local building department early to learn what permits and inspections are required. Common inspection points include foundation work, rough-in utilities, and final installation. Skipping permits creates liability and resale problems. Codes vary by location, frost lines determine footing depth, setback requirements specify distances from property lines, and electrical and gas codes dictate outlet placement and line sizing.
Plan outdoor kitchen utility requirements
Plan gas, electricity, water, and drainage before construction. Gas lines must be sized to code; electrical circuits need proper gauge wire and protection; water lines need shut-off valves and winterization in cold climates; drainage requires slope toward an outlet. Hire licensed professionals, gas line errors cause fires, electrical mistakes cause shocks or fires, and improper drainage damages foundations.
Outdoor Kitchen Construction Phases: Foundation and Infrastructure
Site preparation and grading
Clear vegetation and grade the area so water drains away, with roughly one inch of drop per eight feet. Compact soil thoroughly using a plate compactor to prevent uneven settling and foundation shifts. Mark utility locations clearly before digging, call your local utility locating service to mark all lines.
Foundation work and hardscaping
Most outdoor kitchens sit on a four-to-six-inch concrete slab with proper drainage underneath. In freeze-thaw climates, the slab must extend below the frost line. Hardscaping, patios, pathways, and retaining walls, defines the space and manages water flow. Use permeable pavers for drainage or solid pavers to shed water. Establishing these foundational elements provides the necessary structure to refine your luxury outdoor kitchen layout for maximum efficiency and aesthetic cohesion.
Rough-in utilities and trade coordination
Rough-in means installing hidden infrastructure, gas lines, electrical conduit, water supply, and drainage, before visible work. These must pass inspection before covering. Coordinate trades in the right sequence: plumber first, then gas fitter, then electrician, then mason. Proper sequencing prevents delays and rework.
Outdoor Kitchen Project Timeline: Building and Installation
Framing, masonry, and structural installation
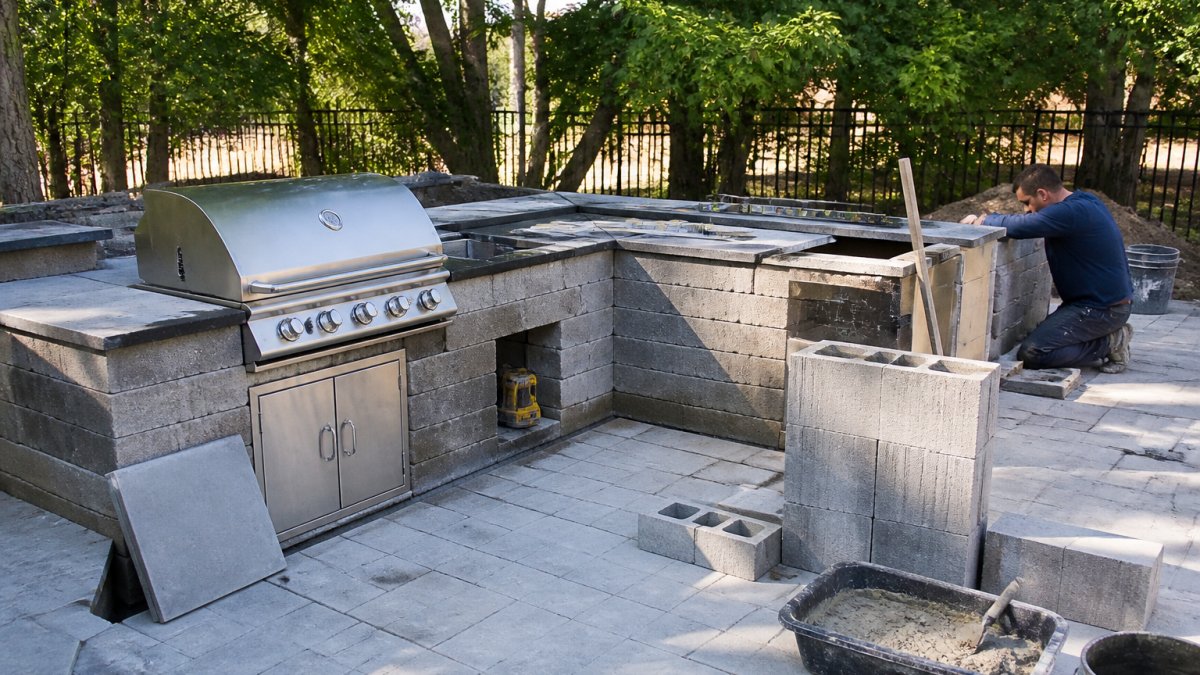
After utilities pass inspection, structural work begins. Choose concrete block (affordable, durable), stone (elegant, long-lasting), steel (open design), or wood (warm but high-maintenance). Proper installation matters most: tight mortar joints, secure connections, and stainless steel or coated fasteners determine longevity.
Appliance and equipment installation
Install appliances once the structure is complete and utilities are ready. Follow manufacturer specifications carefully: grills need proper ventilation to prevent gas accumulation, refrigerators need adequate airflow, and sinks need proper slope for drainage. This prevents safety issues and equipment failure.
Countertops, cabinetry, and finish materials
Choose durable countertops: granite and engineered stone resist staining and heat; tile provides style but requires maintenance; concrete is affordable but needs sealing. Use stainless steel cabinetry (longest-lasting) or marine-grade plywood with outdoor sealant (good durability at lower cost). Avoid standard interior materials. Quality finishes last longer and require less maintenance.
Phase 3: Final Finishes, Testing, and Inspection
Lighting, ventilation, and weather protection
Add task lighting over the cooking area, ambient lighting for entertaining, and accent lighting for architectural features. Install a vent hood over the grill to direct smoke away. Add weather protection, pergola, retractable awning, or roof, based on your climate and usage.
Final inspection and commissioning
Your local building department conducts a final inspection to verify everything meets code. They check electrical safety, gas line integrity, structural soundness, and drainage function. Only after passing inspection can you legally use your outdoor kitchen.
Commissioning means testing everything and teaching you how to use and maintain it. Gas lines get pressure-tested. Electrical circuits get tested for proper grounding. Water lines get flushed. Drainage gets checked. Everything should work smoothly before you host your first gathering.
Managing Budget, Lead Times, and Common Rework Risks
Phasing your outdoor kitchen construction spreads costs and reduces rework risk, but only if you sequence purchases, inspections, and trades correctly.
Phased budget and cash flow strategy
Most homeowners cannot pay for an entire outdoor kitchen upfront. A phased approach lets you spread investment over months or years while maintaining momentum.
A typical phased budget looks like this:
- Phase 1 (Design and permits): Site assessment, design, permits, utility locating. Budget: $1,000-$3,000. Timeline: 4-8 weeks. This phase is non-negotiable and must happen first.
- Phase 2 (Foundation and utilities): Site prep, grading, concrete slab, utility rough-in, inspections. Budget: $5,000-$15,000 depending on site conditions and utility complexity. Timeline: 6-12 weeks. This phase must complete before structure work begins.
- Phase 3 (Structure and appliances): Framing, masonry, appliance installation. Budget: $8,000-$25,000 depending on materials and equipment. Timeline: 8-16 weeks. Appliances are the largest variable cost here.
- Phase 4 (Finishes): Countertops, cabinetry, lighting, weather protection. Budget: $5,000-$15,000. Timeline: 4-8 weeks. This phase can be delayed or simplified if budget tightens.
The advantage of phasing is flexibility. If Phase 2 costs more than expected due to poor soil or utility complications, you can delay Phase 3 and adjust.
Lead times and critical path planning
Lead times are the time between ordering and delivery. Long lead times are the most common cause of project delays. Identify long-lead items early and order them before construction starts.
Common long-lead items:
- Stainless steel appliances: 8-16 weeks. Grills, refrigerators, and specialty equipment often ship from manufacturers or distributors with significant wait times. Order these before foundation work begins.
- Custom countertops: 6-12 weeks. Granite, engineered stone, or custom tile counters are fabricated after measurement and approval. Measure and order once the structure is framed and utility locations are finalized.
- Cabinetry: 6-10 weeks. Custom outdoor cabinetry takes time. Stock options are faster but offer less flexibility.
- Specialty materials: 4-8 weeks. Decorative tile, stone cladding, or custom metalwork may require lead time.
- Permits: 2-6 weeks. Some jurisdictions are slower than others. Submit permit applications as soon as design is final.
Create a critical path timeline that works backward from your desired completion date. If you want to entertain in June, and countertops take 10 weeks, order them by mid-March.
Common rework and how to prevent it
Rework is expensive and demoralizing. Most rework stems from poor sequencing or incomplete planning. Here are the most common rework scenarios and how to prevent them:
Rework scenario 1: Utility placement changes mid-construction
What happens: The homeowner decides to move the sink or grill after utilities are rough-in. The plumber or gas fitter must relocate lines, requiring new inspection and delay.
Prevention: Finalize appliance locations before any utility rough-in begins. Walk the space with the contractor and mark exact locations with chalk or stakes. Take photos.
Rework scenario 2: Appliances arrive before the structure is ready
What happens: A grill or refrigerator arrives weeks early. It sits on the job site, exposed to weather, taking up space, and creating liability if it's damaged or stolen.
Prevention: Coordinate delivery timing with the contractor. Appliances should arrive only when the structure is complete, utilities are ready, and installation can happen immediately.
Rework scenario 3: Concrete slab cracks or settles unevenly
What happens: Poor site prep or inadequate base causes the slab to crack or settle. Appliances don't sit level. Countertops crack. Water pools instead of draining.
Prevention: Invest in proper site prep. Compact soil thoroughly. Use a four-to-six-inch gravel base and a vapor barrier.
Rework scenario 4: Electrical or gas inspection fails
What happens: Rough-in inspection reveals code violations, improper wire gauge, incorrect outlet placement, gas line sizing errors, or missing GFCI protection.
Prevention: Hire licensed professionals for electrical and gas work. Before rough-in, review code requirements with the contractor. Ask the building department for a code summary specific to outdoor kitchens.
Rework scenario 5: Drainage doesn't work
What happens: Water pools around the outdoor kitchen instead of draining. Mold grows. The foundation weakens. Fixing drainage after the kitchen is built requires excavation and costly repairs.
Prevention: Verify drainage slope during site prep. Use a level to confirm at least one-quarter inch per foot of slope from the kitchen toward the outlet. Mark the outlet location clearly.
Rework scenario 6: Weather delays concrete curing or masonry work
What happens: Rain delays foundation work. Extreme heat affects concrete curing. Cold weather prevents mortar from setting. The project stretches longer than planned.
Prevention: Plan your project timeline around your local climate. Spring and fall typically offer ideal conditions, moderate temperatures and lower rain risk. Summer heat and winter cold create delays.
Frequently Asked Questions
Can you build an outdoor kitchen in stages?
Yes. Most outdoor kitchen construction is phased into 3 major stages: planning and permits (weeks 1-4), foundation and utility rough-ins (weeks 5-8), and installation and finishes (weeks 9-12). Phasing spreads costs over time and allows you to adjust designs based on site conditions discovered during early work. However, some utilities must be installed before framing, so work with your contractor to identify which phases can be separated without creating delays or rework.
What outdoor kitchen utility requirements must be planned before construction starts?
Plan for gas lines (if using a gas grill), electrical circuits (for appliances, lighting, and outlets), water supply (for sink and refrigeration), and drainage (for sink and ice maker). These utilities need rough-in before walls and countertops are installed. Building codes require licensed electricians and plumbers to handle these connections. Get utility locations marked by calling 811 before any digging. Budget 2-3 weeks for utility planning and permit approval.
How long does outdoor kitchen construction take?
A typical outdoor kitchen project takes 10-14 weeks from design approval to final use. Site preparation and permits take 3-4 weeks, foundation and rough-ins take 4-5 weeks, and installation and finishes take 3-4 weeks. Weather delays, permit processing times, and appliance lead times can extend timelines. Coordinating multiple trades (electricians, plumbers, masons, cabinet installers) is critical to staying on schedule. Discuss contingency time with your contractor upfront.
Do I need a permit to build an outdoor kitchen?
Yes. Most jurisdictions require permits for outdoor kitchens because they involve electrical, gas, and plumbing work. Building codes also apply to foundation depth, structural framing, and ventilation. Permit requirements vary by location, but expect to submit plans, utility diagrams, and materials specifications. The permit process typically takes 2-4 weeks. Building without permits can result in fines, failed inspections, and insurance issues if problems occur later.