 how-to
How to Plan Outdoor Kitchen Ventilation for Covered Patios
Quick Summary
Outdoor kitchen ventilation under a covered patio is planned around the cover type, the grill's heat and smoke output, and how enclosed the space is. Open pergolas may ventilate naturally, while solid roofs and enclosed lanais usually need a hood with ducting and make-up air.
- Solid roofs and three or more walls usually call for a mechanical hood.
- Extend the hood about 6 inches beyond the cooking surface on each open side.
- Typical hood mounting height is 30 to 36 inches, adjusted to the manufacturer's specifications.
- Avoid flexible duct and minimize bends, since each elbow reduces airflow.
- Plan make-up air in enclosed spaces so the hood does not depressurize the area.
Table of Contents
- Why Ventilation Matters for an Outdoor Kitchen Under a Covered Patio
- Deciding Whether Your Grill Needs a Hood
- Matching Ventilation to Your Patio Cover Type
- How to Size a Grill Hood and Calculate Airflow
- Planning Hood Ducting, Exhaust Discharge and Make-Up Air
- Permit Requirements and Local Code Considerations
- Planning Your Outdoor Kitchen Ventilation with Lush Design Build
- Frequently Asked Questions
How to Plan Outdoor Kitchen Ventilation for Covered Patios
Last Updated: November 1, 2026
Why Ventilation Matters for an Outdoor Kitchen Under a Covered Patio
Smoke, heat, and grease do not disappear just because a patio has a roof. A solid cover traps those byproducts underneath, and that is where ventilation planning begins.
Beneath a roof, hot air rises and collects under the cover.
Combustion gases are the more serious concern. Gas grills and other fuel-burning appliances produce carbon monoxide, which can accumulate in an enclosed or poorly ventilated covered space (the CDC).
Watch out: Treating a covered patio like an open yard is the most common planning error.
Deciding Whether Your Grill Needs a Hood
Not every covered grill needs a hood, but many do. The answer depends on how much smoke and heat the appliance produces, how enclosed the space is, and how the cover is built.
A grill under a fully open pergola with generous clearance may ventilate well on its own. A built-in grill beneath a solid roof, with walls on two or three sides, usually needs mechanical help.
Consider a hood when:
- The grill runs under a solid or low-hanging roof
- The patio has three or more walls or privacy screens
- Smoke regularly settles on nearby seating or the ceiling
Plan the hood with the rest of the build. Lush Design Build can coordinate ventilation with the outdoor kitchen design and construction process, so the grill, roof, and exhaust path are planned together rather than retrofitted.
Matching Ventilation to Your Patio Cover Type
The type of cover over your outdoor kitchen shapes almost every ventilation decision. Each design handles airflow differently.
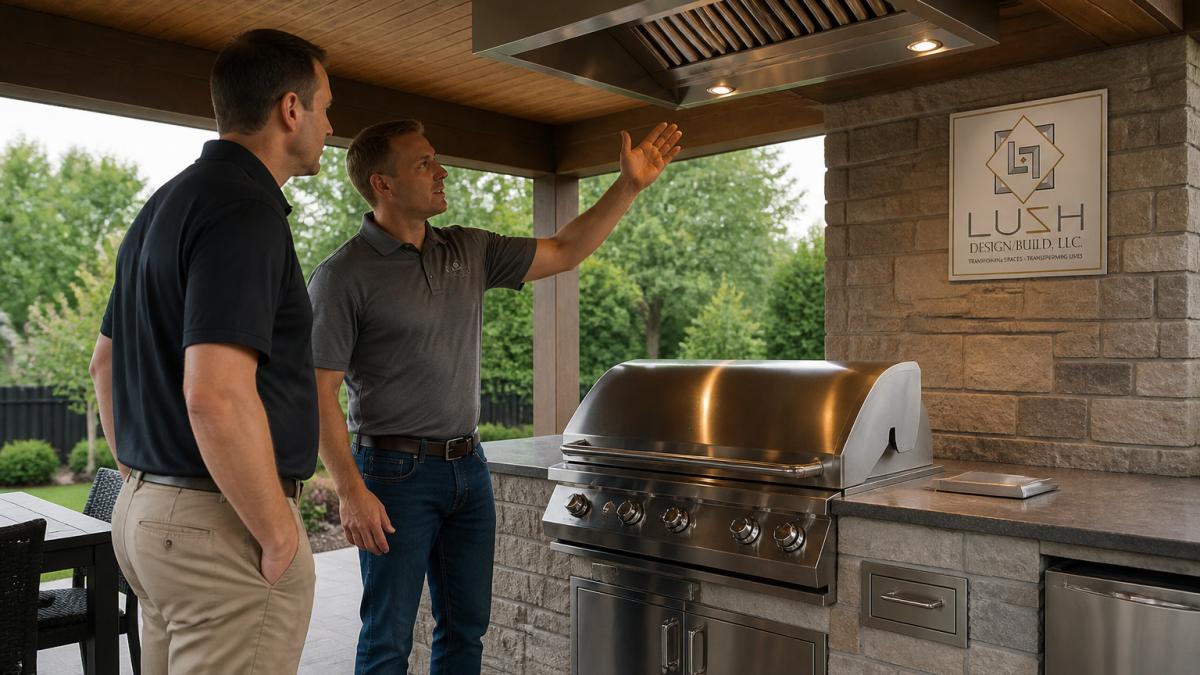
Open pergolas allow air to move freely through the top and sides, so natural ventilation often handles smoke and heat. See how these structures affect airflow and design options.
Solid roof patio covers trap heat and smoke.
Lanai and screened enclosures limit airflow in every direction.
Four-season and partially enclosed spaces need the most planning.
Our practical rule: the more enclosed the cover, the earlier ventilation should enter the design conversation.
How to Size a Grill Hood and Calculate Airflow
Sizing is where most outdoor kitchen plans succeed or fall short. A hood that is too small lets smoke and grease vapor spread under the cover; one that is too large can overwhelm the space and pull conditioned air from the house. The goal is a hood that captures the plume at the source and an exhaust rate that clears it without creating pressure problems.
Start with the cooking surface, not a generic CFM number
Hood sizing begins with the grill footprint. A common rule of thumb is that the hood should extend beyond the cooking surface by about 6 inches on each open side, and more on the back or sides against a wall.
For a built-in grill measuring 42 inches wide by 24 inches deep, a hood roughly 54 inches wide by 36 inches deep would provide that overhang on the front and two sides. Confirm the exact overhang with the manufacturer's instructions.
Mounting height affects capture
Hood mounting height is a balance: lower hoods capture better but can interfere with cooking and headroom, while higher hoods are more comfortable but allow more plume spread. Most manufacturers publish a recommended mounting height above the cooking surface, often 30 to 36 inches, but that varies by hood design and appliance. Start with the manufacturer's number, then adjust for ceiling height and the cook's comfort.
A simple airflow estimate
Airflow is measured in cubic feet per minute (CFM). There is no single universal CFM formula for outdoor grills, but a practical starting method is to target a face velocity across the hood opening that accounts for crosswinds and the open nature of the space.
A simplified worked example:
- Hood opening area. A hood 54 inches wide by 36 inches deep has an opening of 54 × 36 = 1,944 square inches, or 13.5 square feet.
- Target face velocity. Suppose the design target is 100 feet per minute (fpm) across that opening, a reasonable starting point for a protected outdoor hood, though higher targets may be needed in windy or very open locations.
- Estimate CFM. CFM = area (square feet) × velocity (fpm) = 13.5 × 100 = 1,350 CFM.
That gives a ballpark exhaust rate. Real equipment selection should use the hood manufacturer's published performance data, the grill's heat output, and the enclosure conditions. A professional can refine the number and confirm that the ducting and make-up air can support it.
Match the hood to the cooking style
Light, occasional grilling needs less capacity than frequent searing, smoking, or frying. If the outdoor kitchen includes a smoker, pizza oven, or side burner, size the hood for the worst-case cooking scenario the homeowner expects, not the average weeknight.
When to bring in a professional
Sizing is one of the places where a design-build contractor's input matters. The right approach combines the grill dimensions, the hood manufacturer's requirements, the cover type, and local conditions into one calculation.
The article walks through the key sizing numbers, which can be scanned at a glance:
Item | Value | Note |
|---|---|---|
Hood overhang beyond cooking surface | About 6 inches per open side | More on sides against a wall |
Example hood size for 42 x 24 inch grill | 54 x 36 inches | Confirm overhang with manufacturer |
Typical mounting height | 30 to 36 inches | Varies by hood design and appliance |
Example hood opening area | 13.5 square feet | 54 x 36 inches |
Target face velocity in example | 100 feet per minute | Starting point for protected hood |
Estimated airflow in example | 1,350 CFM | Ballpark, refine with manufacturer data |
Planning Hood Ducting, Exhaust Discharge and Make-Up Air
Ducting and make-up air are the parts of outdoor kitchen ventilation that homeowners rarely think about until something goes wrong. A well-sized hood on poor ducting will underperform, and a hood that exhausts air without a plan for replacement air can create pressure problems that affect both the hood and the house.
Ducting: keep it short, smooth, and sized to the hood
The duct carries smoke and grease vapor from the hood to the discharge point. Every foot of duct, every bend, and every transition adds resistance, which reduces airflow. A hood rated at a certain CFM will only deliver that performance if the duct is sized and routed to match.
Practical rules:
- Match duct size to the hood's outlet. Reducing duct size at the hood outlet chokes airflow. Use the diameter or rectangular size the manufacturer specifies.
- Minimize bends. Each 90-degree elbow adds resistance equivalent to several feet of straight duct. Two 45-degree elbows are often better than one 90-degree elbow.
- Keep runs short and direct. Route the duct toward the nearest exterior wall or roof penetration that makes sense for the discharge point.
Exhaust discharge: where the smoke goes matters
The discharge point determines where the exhaust ends up. A discharge that dumps smoke onto a patio, into a window, or toward a neighbor's property defeats the purpose of the hood.
Good discharge practice:
- Terminate above or away from the covered area. Exhaust should not re-enter the patio or drift into open windows and doors.
- Respect clearance to openings. Keep the discharge a reasonable distance from operable windows, doors, and intake vents. Local codes and manufacturer instructions may specify minimum distances.
- Consider wind and prevailing direction. A discharge that works on a calm day can fail in a prevailing wind. Plan the termination so wind does not push exhaust back under the cover.
Make-up air: the other half of the system
A hood removes air from the space, and that air has to come from somewhere. In a covered patio open on one or two sides, outside air may enter naturally. In a more enclosed space, a lanai, screened porch, or four-season room, the hood can depressurize the area, weakening its performance and pulling air through gaps, doors, or the house itself.
Make-up air planning:
- Estimate the replacement air need. As a starting point, the make-up air supply should be able to replace the air the hood exhausts. A professional can calculate the balance based on the hood's rated CFM and the enclosure's tightness.
- Provide a deliberate path for replacement air. Passive openings, louvers, or a dedicated make-up air unit can supply replacement air. The goal is to give the hood an easy path to draw air rather than forcing it to pull through the house.
- Coordinate with HVAC. In four-season rooms and enclosed patios, the make-up air strategy has to work with the heating and cooling system. A tight enclosure with a powerful hood and no make-up air can backdraft combustion appliances or pull in unconditioned air.
A note on code and manufacturer instructions
Ducting and discharge requirements vary by jurisdiction and by appliance. Local building departments may have specific rules for exhaust termination, clearance to openings, and make-up air, and manufacturer instructions for the hood and grill set requirements that must be followed. Treat local code and manufacturer literature as the authority; general guidance like this is a planning framework, not a substitute.
If you are planning a luxury outdoor kitchen in Central Indiana, contact Lush Design Build to discuss your project.
Permit Requirements and Local Code Considerations
Local building departments in the Indianapolis area set their own requirements, so confirm the rules for your specific address before finalizing a design.
Understanding the full cost picture, including permits and utility work, is easier when you review a detailed outdoor kitchen cost guide before committing to a build.
Confirm before you build. Ask your contractor which permits apply, who pulls them, and how inspections are scheduled.
Planning Your Outdoor Kitchen Ventilation with Lush Design Build
Good outdoor kitchen ventilation comes from planning the cover, grill, hood, ducting, and makeup air as one system. Lush Design Build approaches these decisions during the design phase, so the layout supports both cooking performance and the architecture of your patio.
Lush Design Build offers outdoor kitchen, pergola, and covered outdoor structure work. If you are planning a luxury outdoor kitchen in Central Indiana, or looking for a trusted deck and patio builder in Fishers, we can help you map out the right ventilation approach.
Ready to plan your covered outdoor kitchen? Get a project estimate from Lush Design Build and start with a conversation about your layout, cover, and cooking style.
Frequently Asked Questions
Do outdoor kitchens under a covered patio need a vent hood?
A vent hood is often recommended under a covered patio because a solid roof can trap heat, smoke and combustion gases near the cooking area. Whether one is required depends on local codes, the grill manufacturer's installation instructions and how enclosed the space is. Open-sided covers with generous airflow may need less exhaust than a fully enclosed kitchen. Confirm both the code and manufacturer requirements before you finalize the layout, and plan for hood placement during design rather than after the patio is built.
How do you size a vent hood for an outdoor grill?
Hood sizing starts with the grill's footprint. Most hoods are sized to extend beyond the cooking surface on all sides, which captures rising heat and smoke more effectively. Mounting height, cooking surface area and the cover's ceiling height all influence the required airflow measured in cubic feet per minute (CFM). Ask your contractor to calculate the airflow for your specific grill and cover dimensions rather than relying on a generic chart, since patio geometry changes the result.
How much clearance does an outdoor grill need under a covered patio?
Clearance requirements vary by grill model and manufacturer, so the installation manual is the first reference. Typical planning considerations include the distance from the cooking surface to the underside of the roof, the distance to combustible materials such as wood beams or screens, and the hood's mounting height. Noncombustible materials near the grill reduce fire risk. Because local codes may set additional minimums, verify clearances with your local building department before construction begins.
Do I need a permit to install an outdoor kitchen vent hood?
Many jurisdictions require permits for outdoor kitchens that include gas lines, electrical service, or structural changes to a patio cover, and a vent hood with ducting may trigger review. Permit rules differ by municipality and county, so contact the local building department in your area. A licensed contractor can usually help identify which elements require permits.